In This Guide
Import Using the Excel Template
Manually create your own transactions file using our pre-formatted Excel template, then upload it directly into Providence.
Download the Transactions Template
Download our Excel template file. This template contains all the required columns formatted correctly for Providence to read.
Download Transactions Template (.xlsx)Fill In Your Transactions
Open the template in Excel, Numbers, or Google Sheets. Each row represents one transaction. Fill in the following columns:
| Column | Required | Description | Example |
|---|---|---|---|
| Date | Yes | Transaction date | 01/15/2026 |
| Amount | Yes | Positive for income, negative for expenses | -85.50 |
| Description | Yes | Transaction description | Grocery shopping at Costco |
| Account Type | Yes | Type of account (Checking, Savings, Credit Card, etc.) | Checking |
| Account | Yes | Name of the account | Wells Fargo |
| Category | Yes | Spending category | Food.Dining |
| Subcategory | No | More specific category | Groceries |
| Merchant | No | Merchant or vendor name | Costco |
| Comments | No | Personal notes | Monthly groceries |
| Location | No | Transaction location or trip name | New Jersey |
Upload to Providence
In the Providence app, navigate to Import from the sidebar (Mac/iPad) or the More tab (iPhone). Select Import Excel File and choose your completed template file. Providence will read all transactions and present them for review.
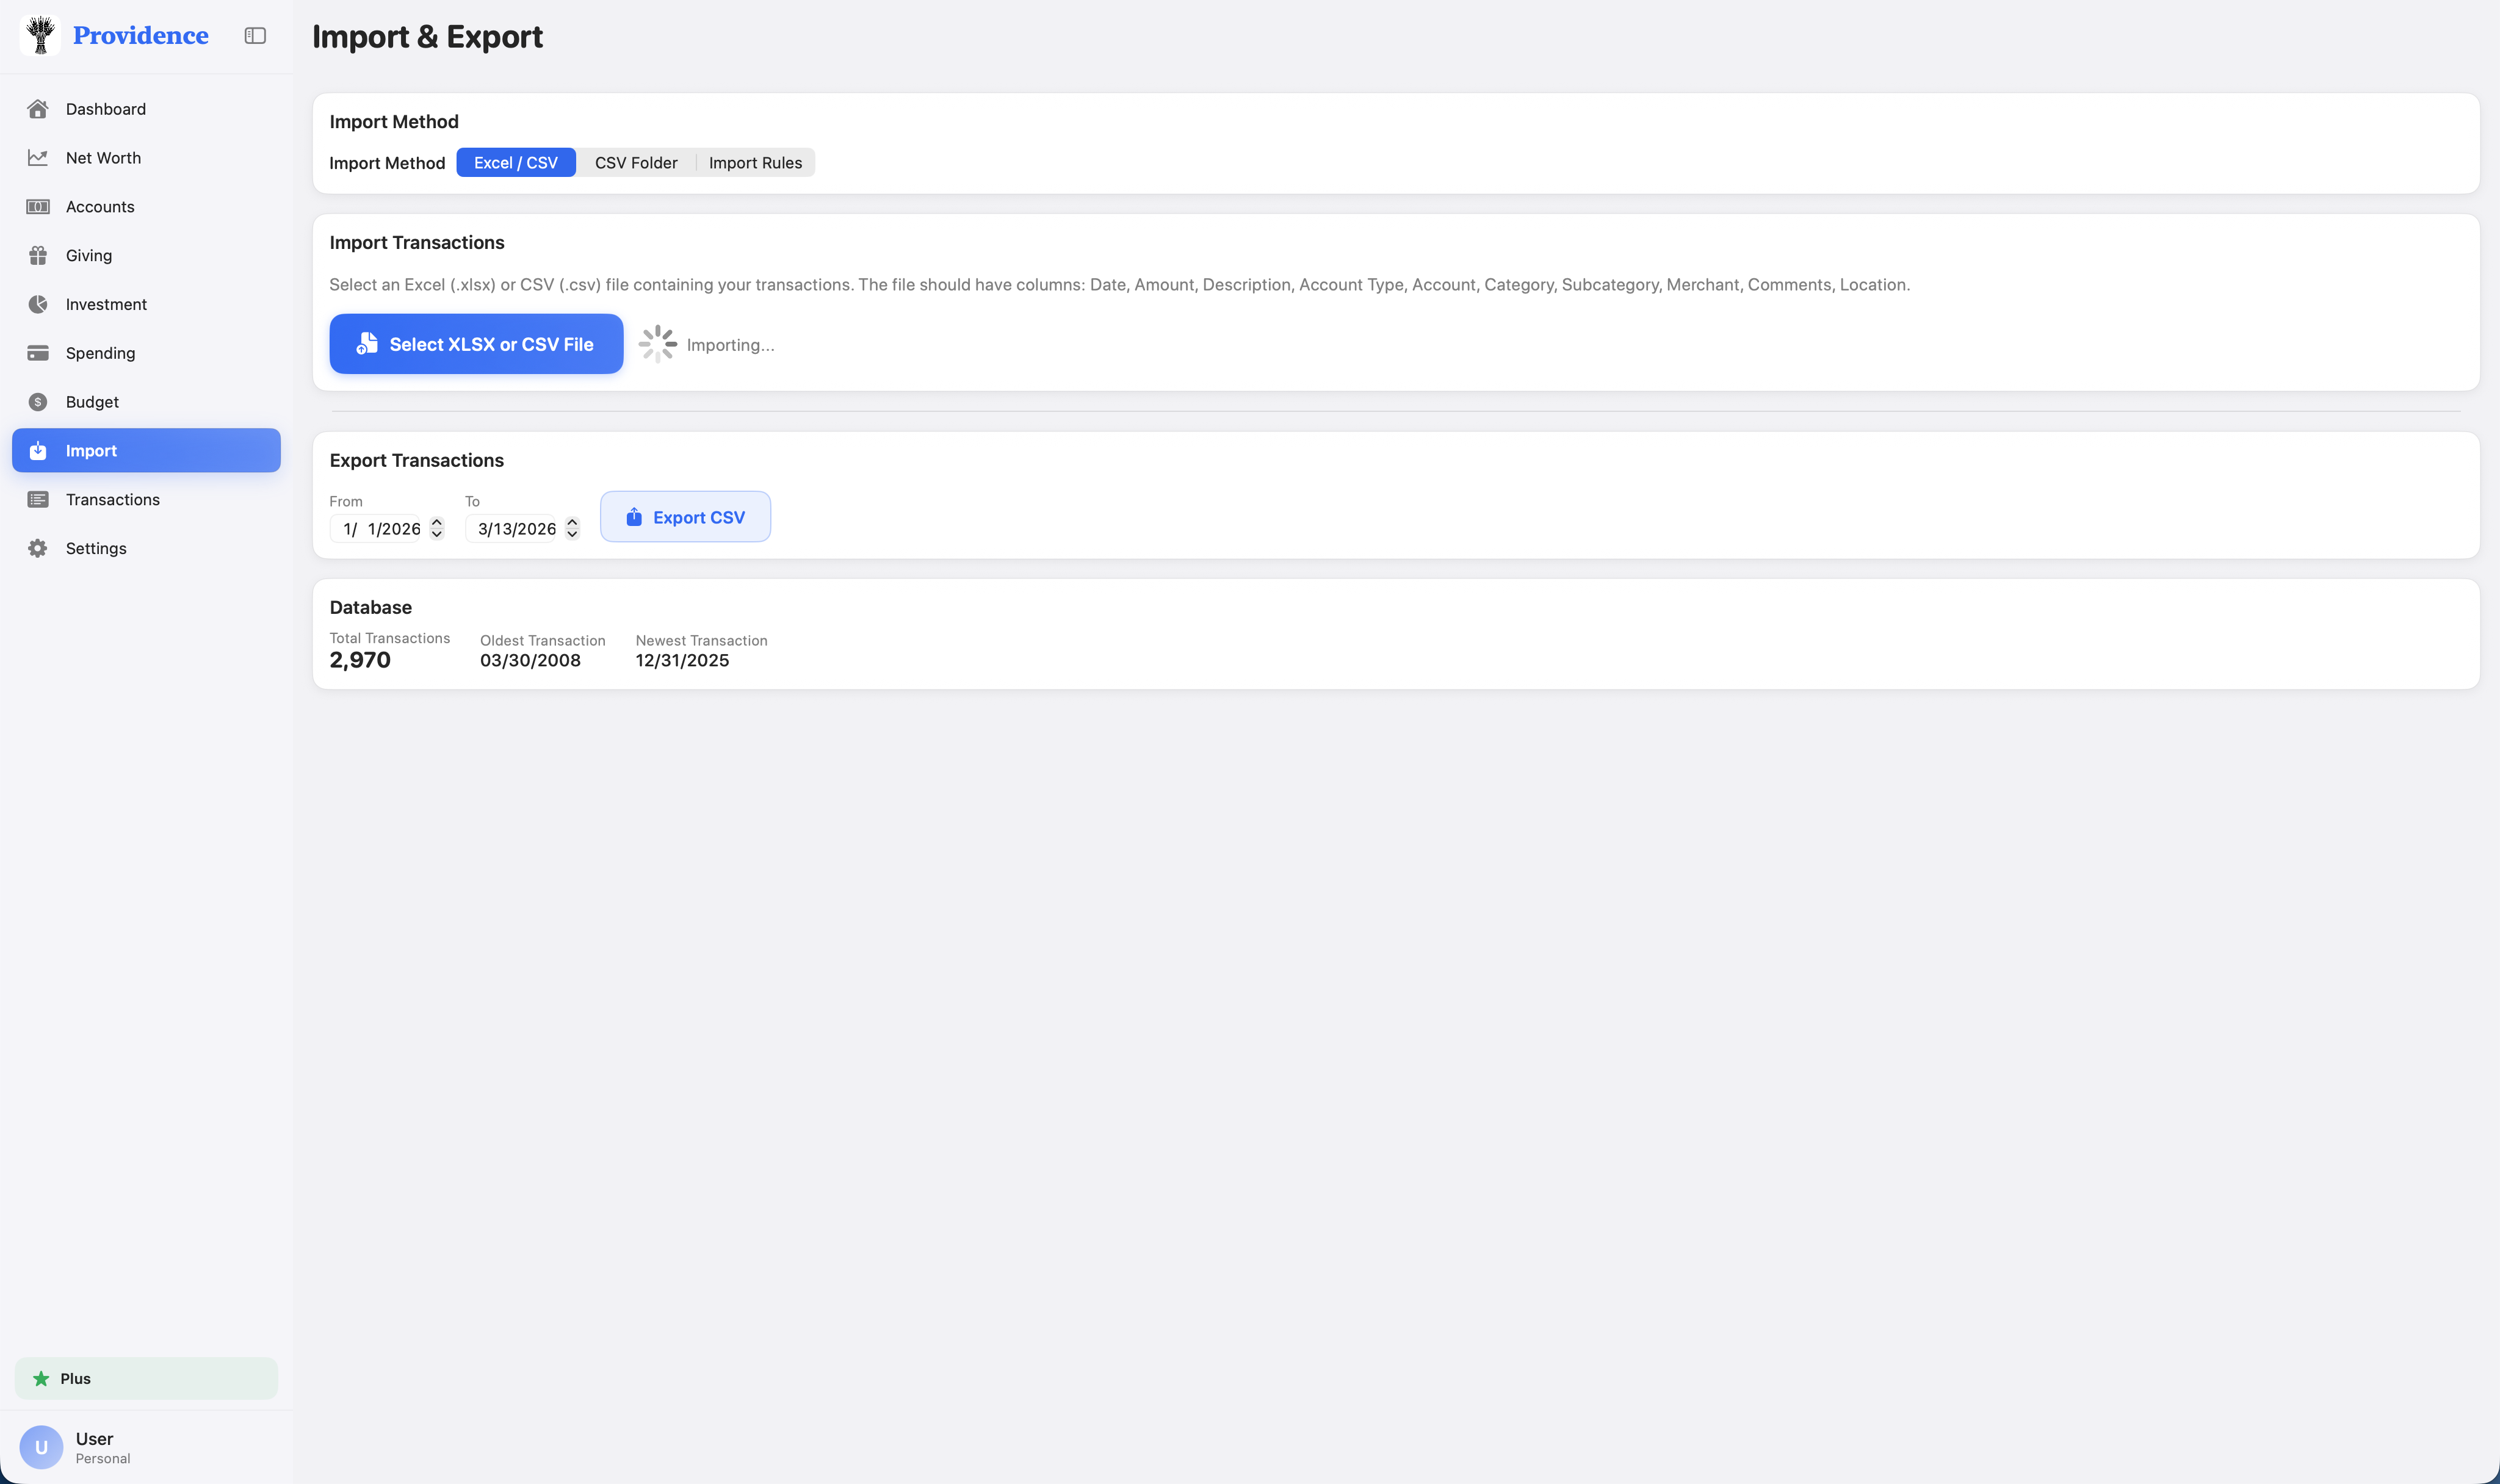
Import CSV Files from Your Bank
Download transaction CSV files from your individual bank accounts and use Providence's batch CSV import feature.
Download CSV Files from Your Banks
Log into each of your bank's online banking portal and download your transaction history as a .csv file. Most banks offer this option under "Statements" or "Transaction History" → "Download" or "Export".
Supported banks include: Wells Fargo, Texans, Fidelity, Apple Card, Discover, Citi, Costco, Target, Macy's, and many more. Files are auto-detected by filename and parsed with bank-specific column mappings.
Organize CSV Files in a Folder
Place all your downloaded bank CSV files into a single folder on your computer. You can include CSV files from multiple banks in the same folder — Providence will automatically detect which bank each file belongs to based on the filename.
Import the CSV Folder in Providence
In the Providence app, navigate to Import and select "Select CSV Folder". Choose the folder containing your CSV files, then click "Import All CSVs".
The CSV Import screen shows a processing log with total read, new, duplicate, and error counts
Review Auto-Categorized Transactions
Providence automatically categorizes your transactions based on description keywords. It also detects and flags duplicate transactions. Review the imported transactions in the list, make any corrections needed, then click "Save to Database".
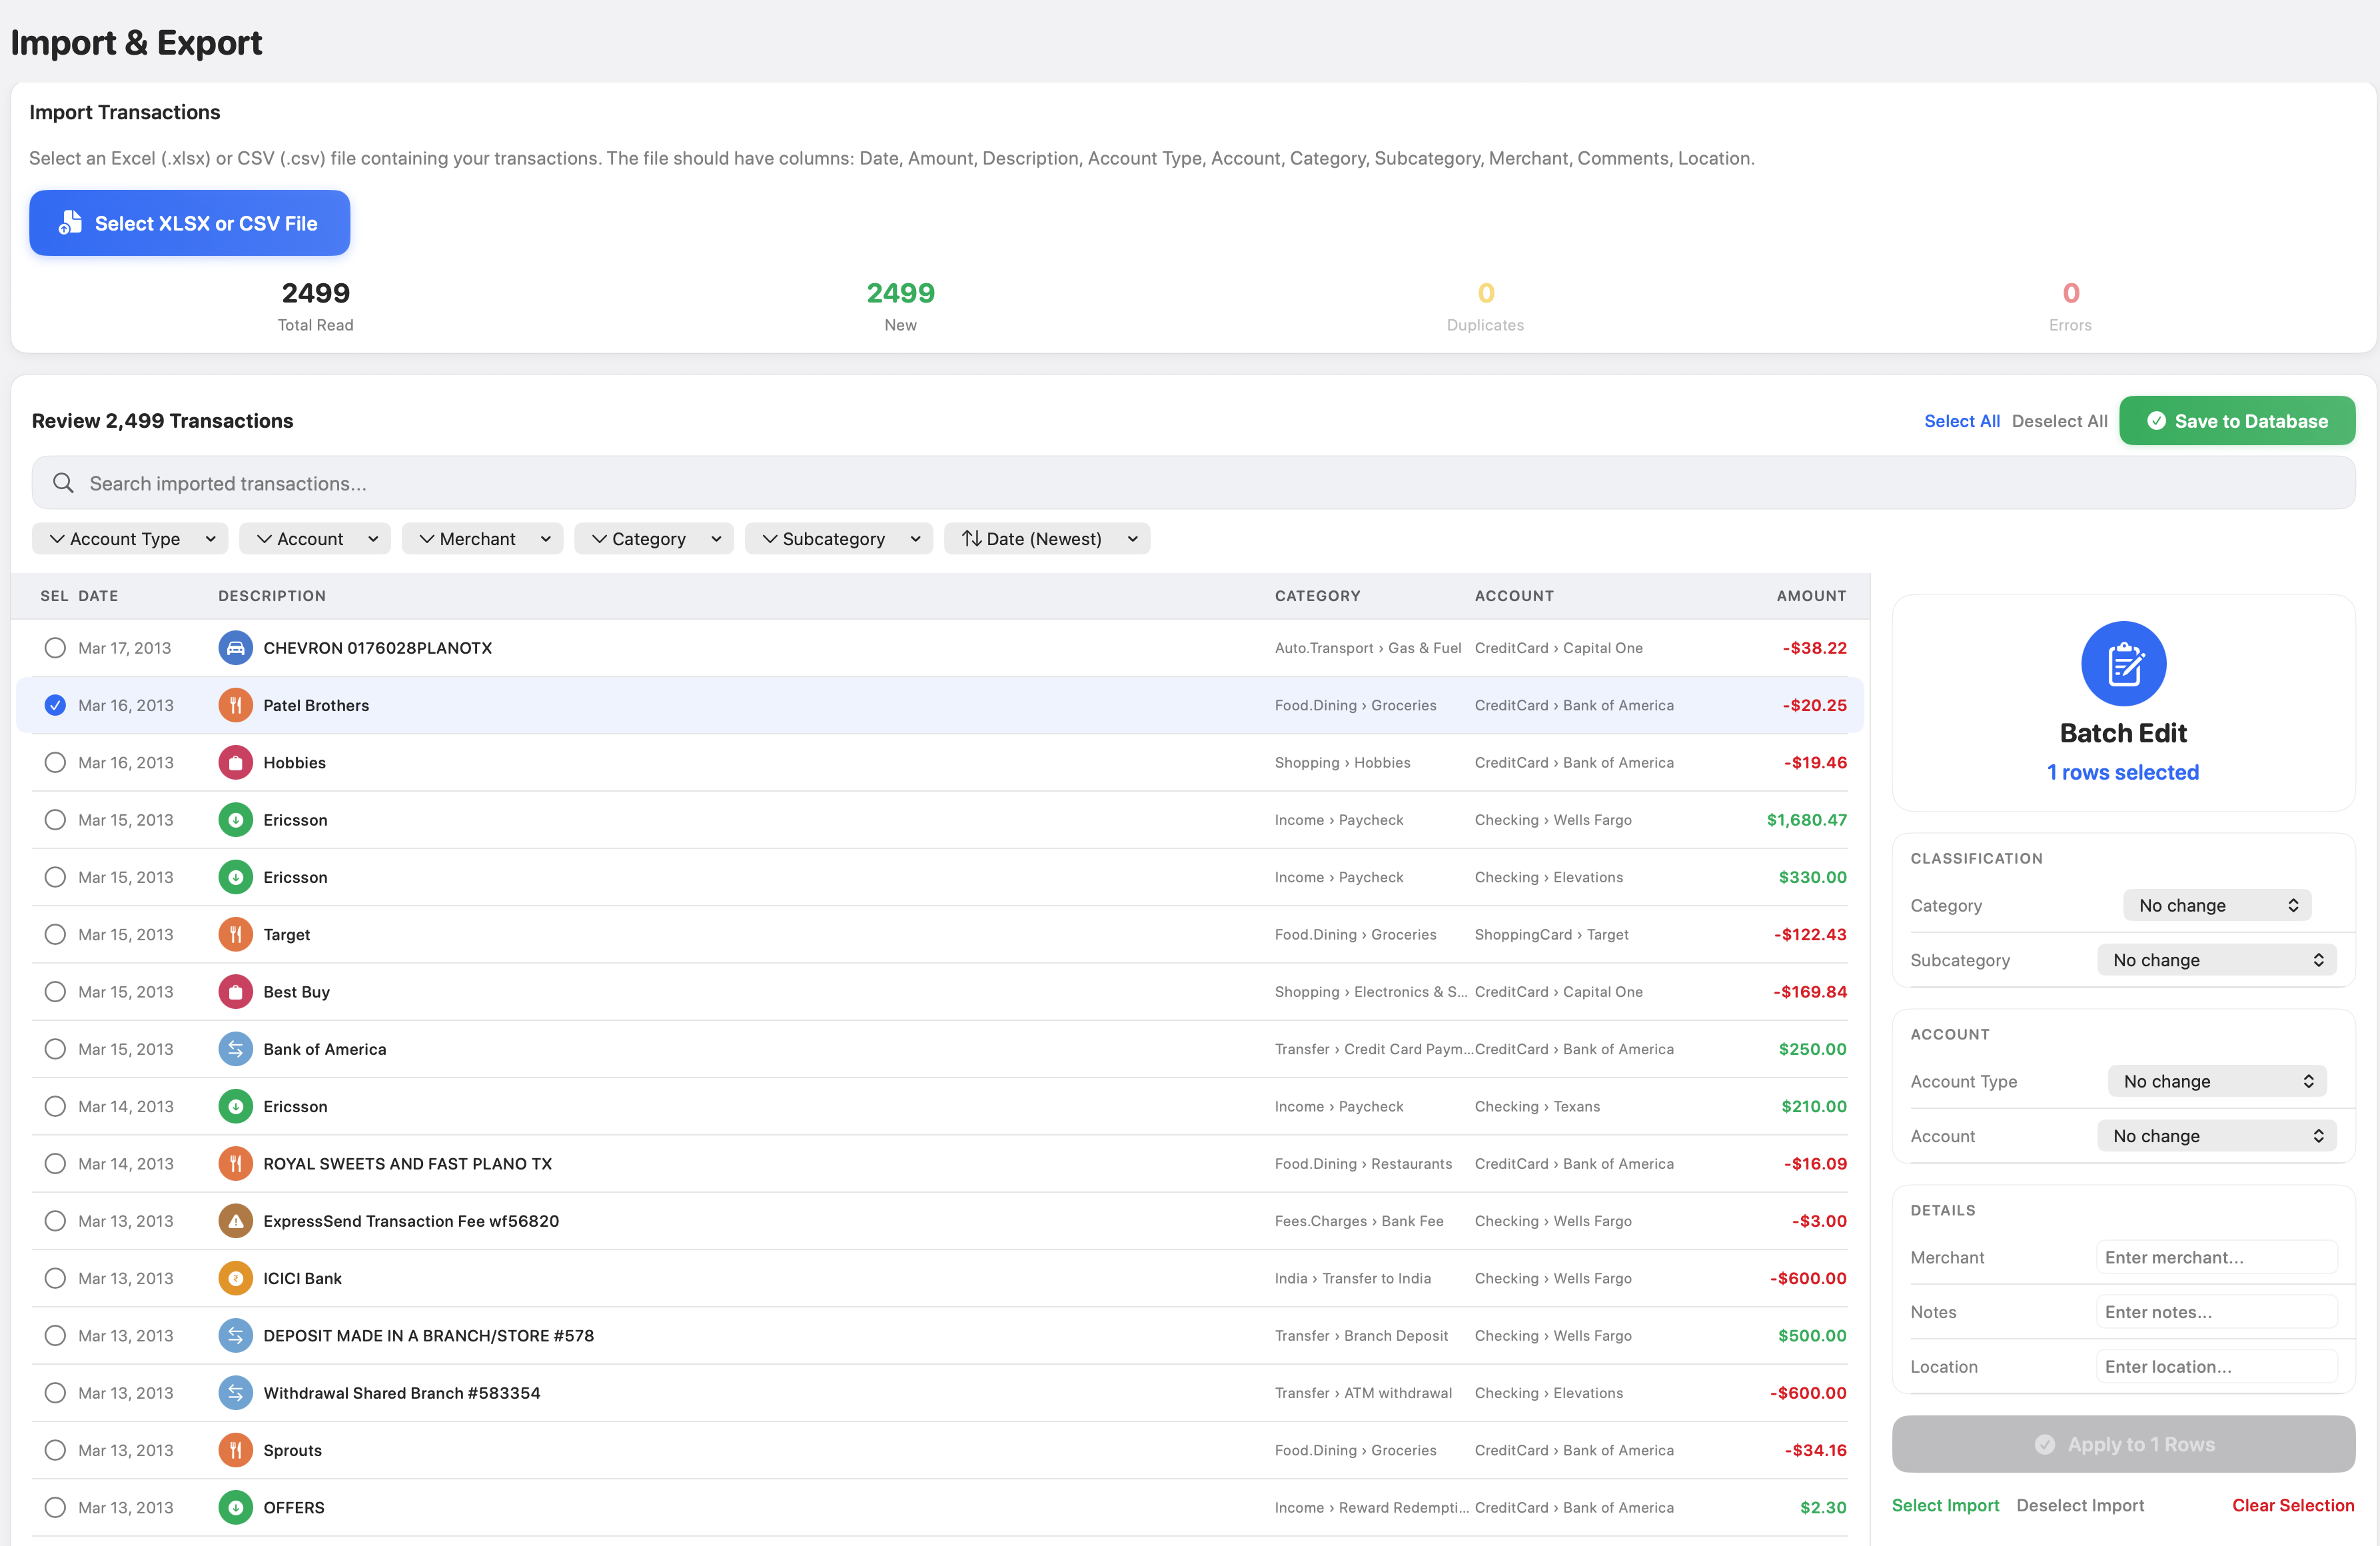
Review auto-categorized transactions before saving to your database
Review & Save Your Transactions
After importing via either method, take a moment to review and refine your data.
Review Categories
Check that auto-assigned categories match your expectations. You can tap any transaction to edit its category, subcategory, account, merchant, or any other field.
Resolve Duplicates
Providence automatically flags potential duplicates. Deselect any transactions you don't want to import before saving.
Save to Database
Once you're satisfied with the imported data, click "Save to Database". Your transactions will be stored locally and synced across all your devices via iCloud.
Add Individual Transactions
Going forward, you can add transactions one at a time using the Add Transaction form. Navigate to Transactions and tap the + button.
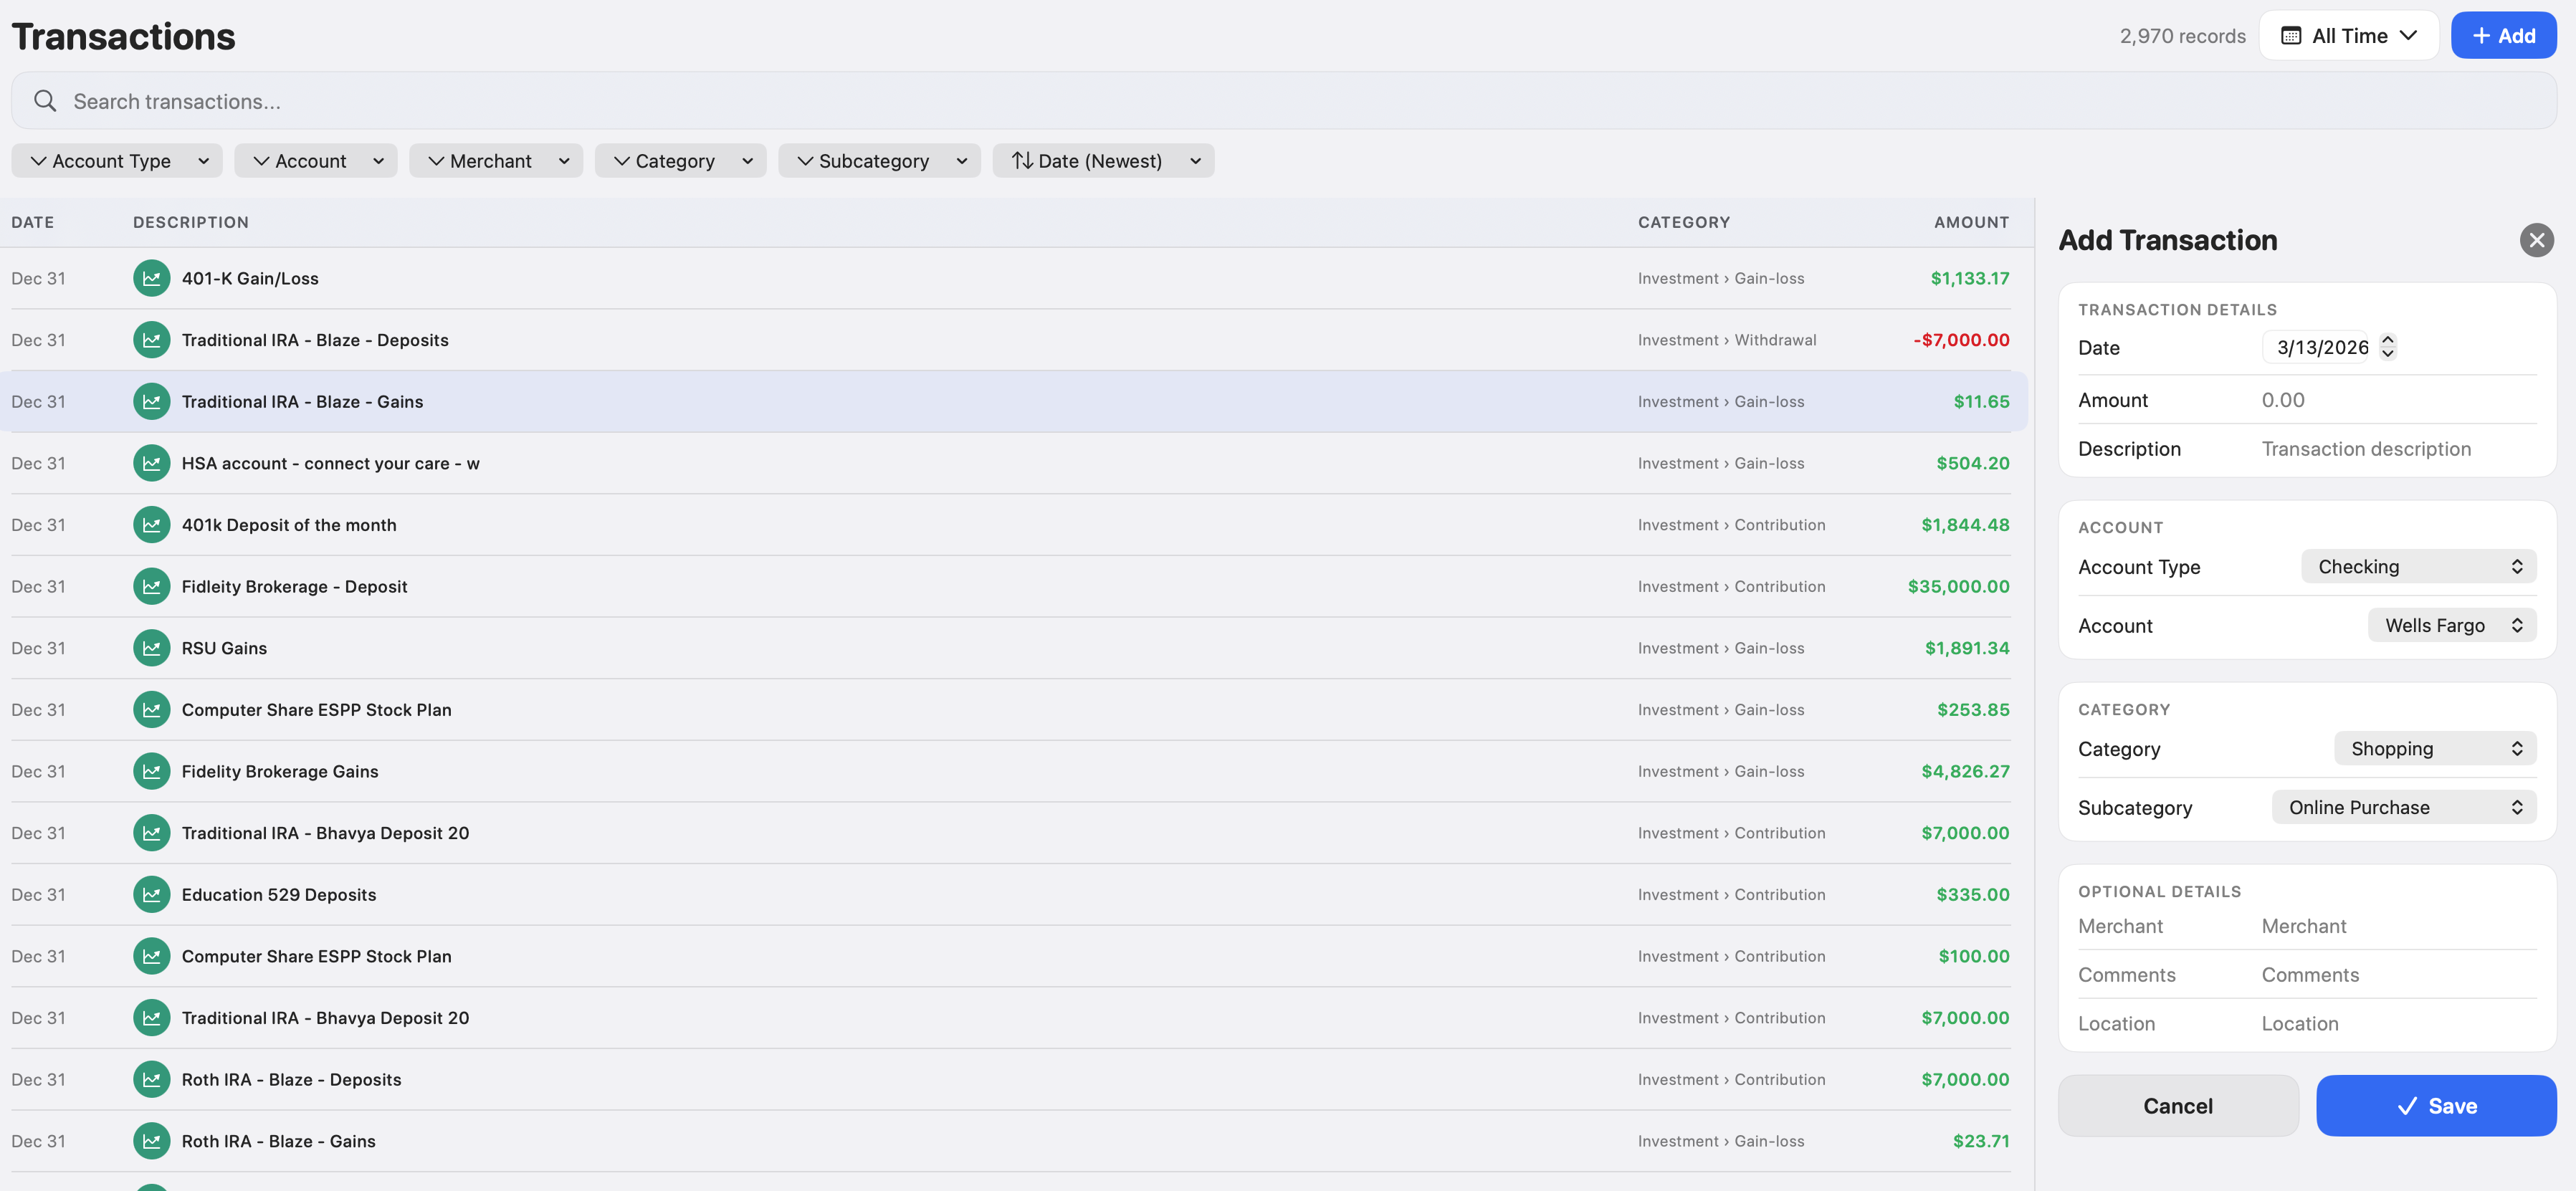
The Add Transaction form lets you enter all details including date, amount, account, category, merchant, and location
Transaction Template Columns Reference
Here's a complete reference for the Excel template columns and accepted values.
Account Types
Checking, Savings, Credit Card, Investment, Brokerage, 401K, IRA, HSA, 529, ESPP, Loan, Mortgage
Common Categories
Income, Bills.Utilities, Food.Dining, Shopping, Home, Auto.Transport, Education, Health.Fitness, Travel, Gifts.Donations, Investment, Transfer, Fees.Charges, Taxes, MiscExpenses
Income Subcategories
Paycheck, Bonus, Interest Income, Reimbursement, Reward Redemption, Rental Income
Amount Format
Use positive numbers for income (e.g., 3500.00) and negative numbers for expenses (e.g., -85.50). Do not include currency symbols.
Need help with importing?
If you run into any issues or have questions, our support team is here to help.
Contact Support